Learning The Panning Shot
By David Stenhouse
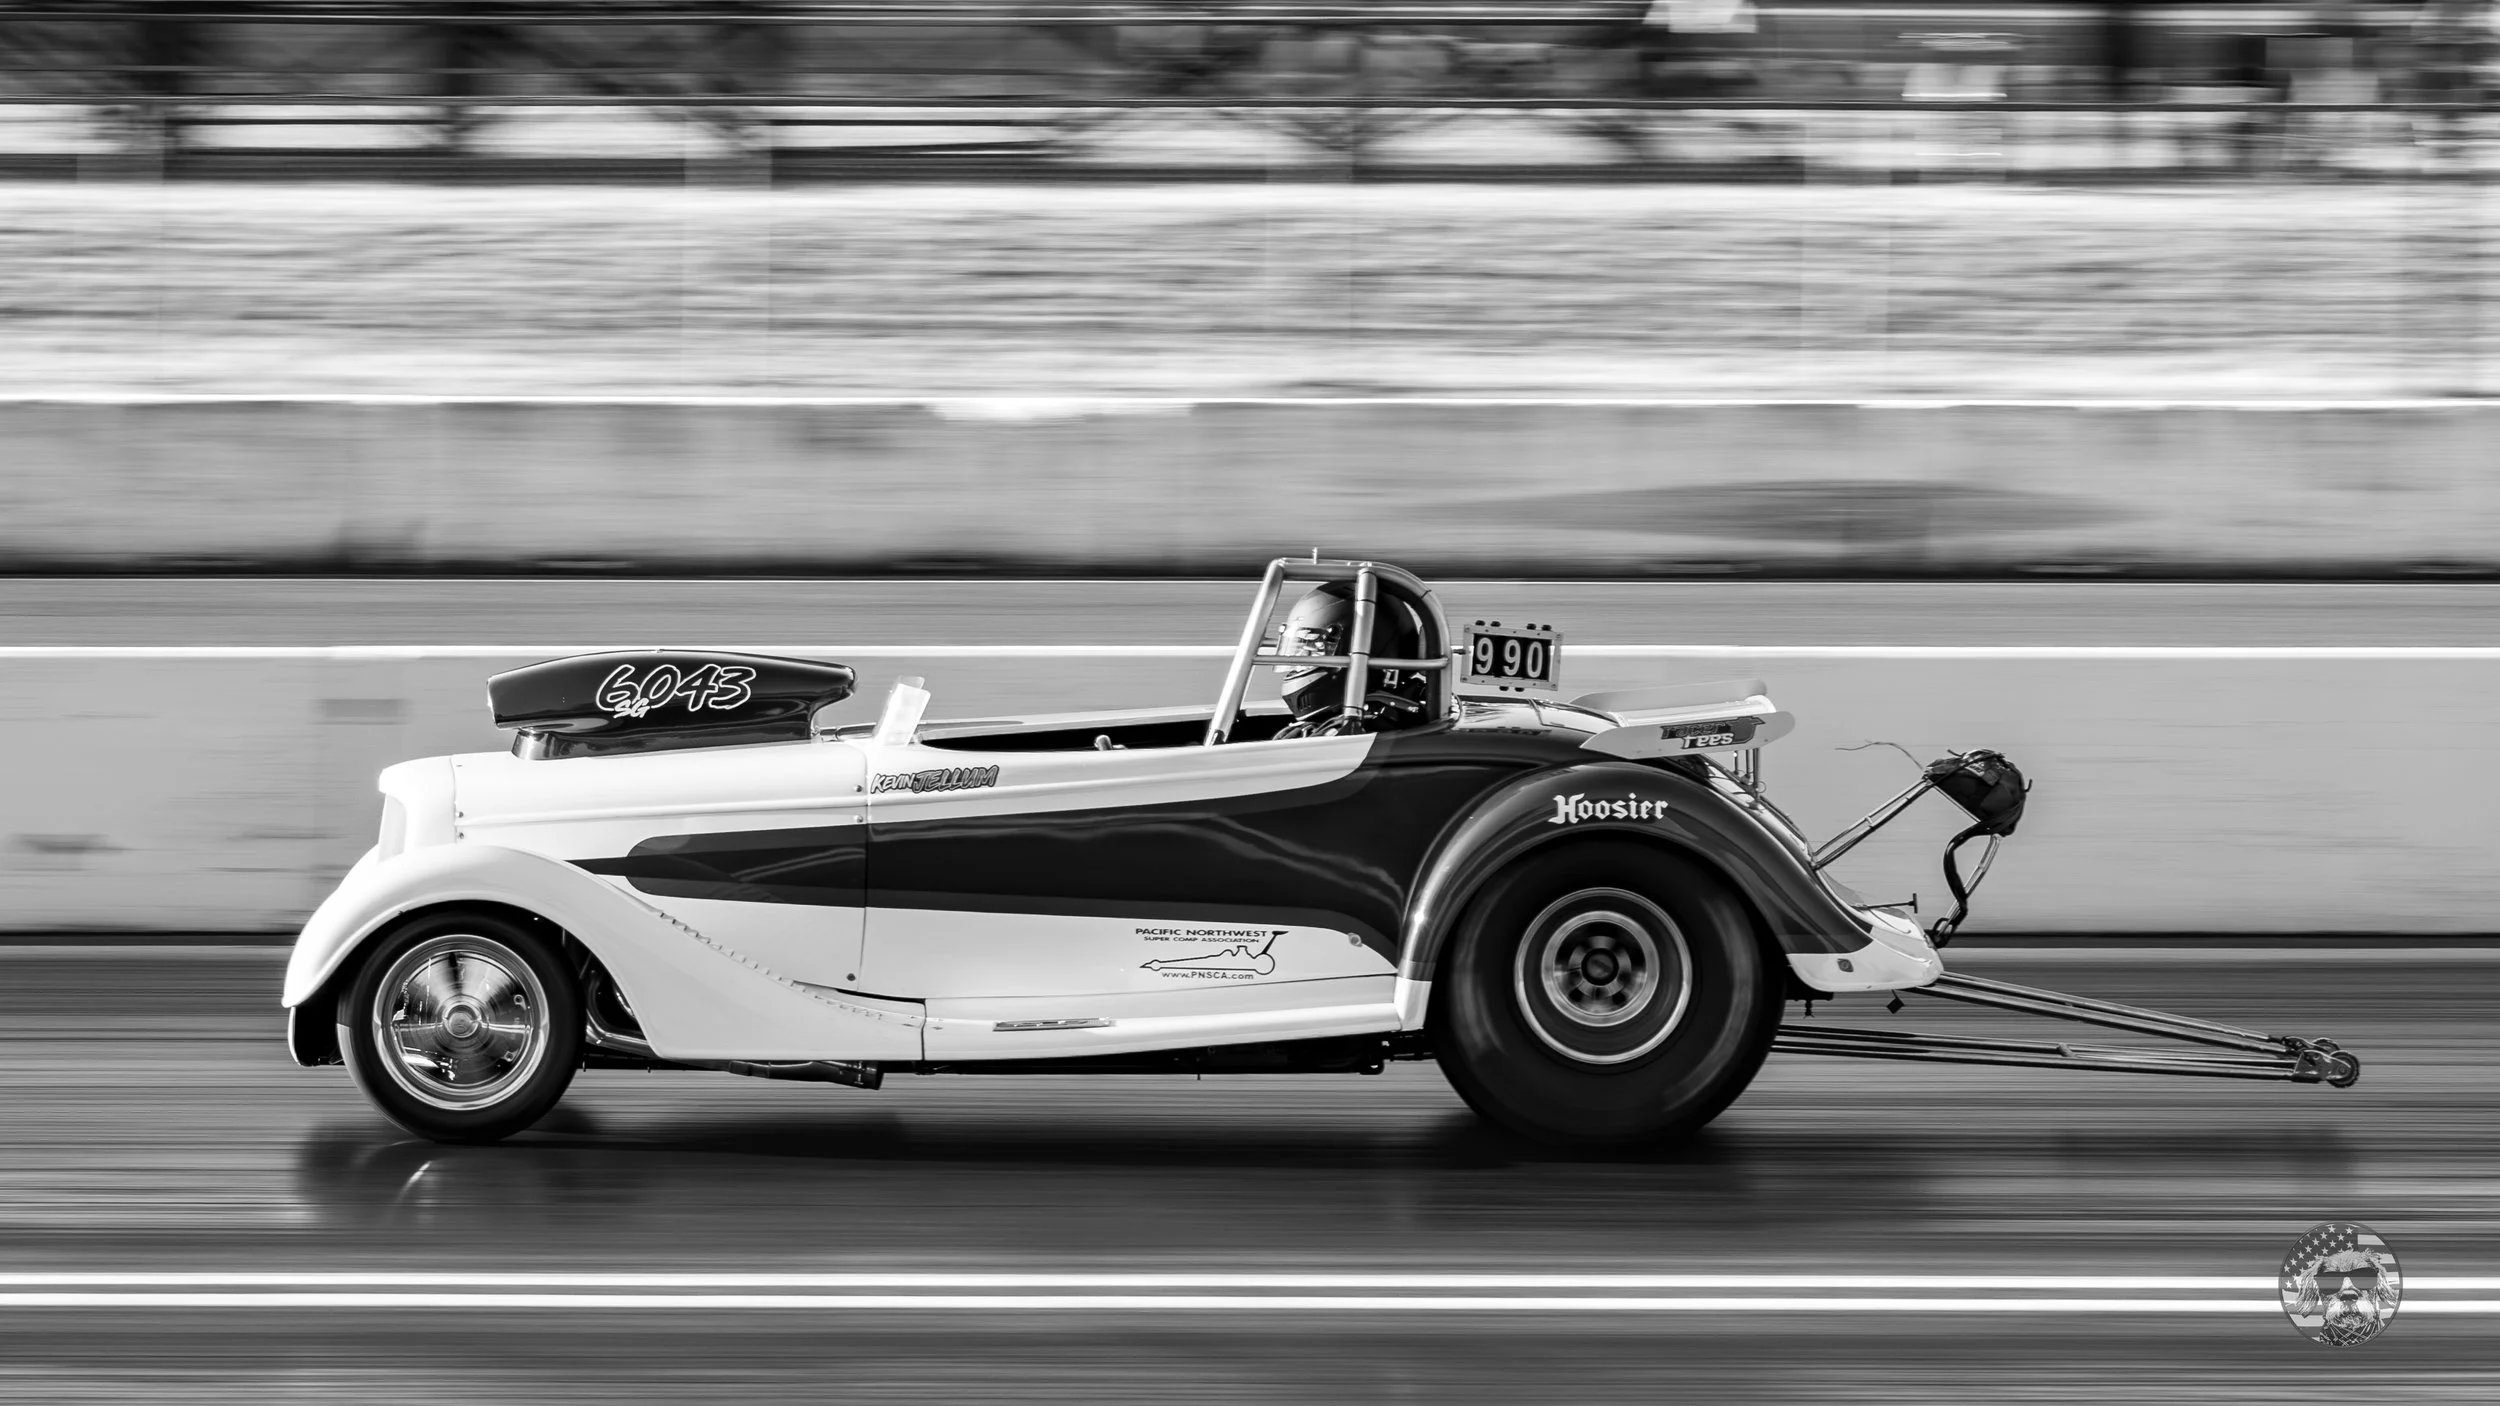
I finally noticed my shots of passing cars looked like they were parked in the middle of the track. Rookie mistake. Action on a track is fast, so high shutter speeds are warranted, correct? No. High shutter speeds freeze the wheels and background turning motion into a static image.
However, if I slow down the shutter speed and follow the subject smoothly while firing the shutter, then a seemingly frozen image comes to life to life. With cars and motorcycles, that means blurring the background as the vehicle moves left or right, with the wheels spinning. This shot requires the photographer to match the speed of the subject horizontally left or right, keeping the subject in focus with the moving parts moving.
Some items to note from my experience thus far:
My Camera
The photos in this post have been shot with a Nikon D5300, my training partner since 2021. I believe to be stretching this camera’s capabilities. The make/model was purchased on eBay for $287.00 after watching an Aaron Ardino YouTube video. It has limits but it has been a great camera for me (I am currently upgrading).
The crop-sensor D5300 has been forcing me to learn techniques for which technology cannot compensate. I have enjoyed using it and will always keep the camera as a backup.
Shutter Speed Is The Key
I find the best shutter speed for me resides between 1/250 and 1/320. 1/250 creates a nice and smooth wheel motion. The background is blurred, but it is much harder for me to keep the subject sharp. And most of my shots are with slower bracket cars at speeds much less than their nitro cousins. Nitro may require me to bump up to shutter speeds a bit.
Lens
I use a Tamron G2 70mm-200mm F2.8 G2 lens to capture most of my panning shots. I do go up to 200mm due to me being in the stands, but most shots are around 100mm. When closer to the starting line and behind the barriers, the Tamron 24mm-70mm G2 F2.8 lens is my friend. These lenses solidify the idea that “good glass with a lesser camera” will always be better than “lesser glass combined with a stellar camera”. I’m happy with the quality of these products.
Focus
I started using a single focus point; however I switched to nine points of focus, keeping the focus mode in “continuous”, where the camera continues refocusing the subject until the shutter is released. My D5300 works hard trying to keep up with the action and the single point resulted in to many blurry shots. Trigonometry will reveal the car is getting closer and will appear speeding up rather quickly as it becomes perpendicular with the camera angle. And then it will appear slowing as it gets farther away. The spot at which it is right in front of me allows for the sharpest images (especially the cars with many stickers); however they are also the least interesting, offering only a 2-dimensional view of the subject as it passes.
I find that just like trap shooting I catch myself trailing the subject a bit, creating a shot that pushes the subject to the side of the frame. I have to concentrate on where I’m placing the focal point, not concentrating on the middle but the front end of the car. Having a second vehicle in the frame just adds to the effect, especially if my focal point is in focus and the second vehicle is a bit blurred.
Positioning
Pacific Raceways has a very large set of stands on the south side of the track. Due to the jersey barriers on each side of the lanes, I have to position myself a little higher, but I do try to get as close as possible. Many of the shots in this article and the below gallery have been cropped to remove the closer barrier. I can go higher, but the higher I climb to capture more of the near car, the more chance I lose driver faces and catch too much of the car tops.
Brian Goffe, an experienced motorsports photographer, told me “It’s drag racing, which means two cars. Get two cars in the shot.”—wonderful advice that I try to follow. With index racing, that can be difficult. The cars have a staggered start, so they may not meet up side-by-side until the finish line. I like to catch the drivers looking at each other, so I spend a much time at the top end for panning shots.
For Me, Repetition Is Everything
Repetition is key for me. 10,000 repeated steps is what it takes for my education. Well, since I am the slowest of slow learners, let’s throw in a few thousand more just to be sure.
When the sun is high in the sky and the light is harsh, spending a couple of hours taking hundreds of panning shots works. I make sure I am standing, allowing free movement to properly pan the shot horizontally. Just like shooting a firearm, I don’t jerk the trigger but lightly press. And when I let go of the button I make sure my panning is still in motion, keeping the last shots as smooth as the first. Then, I repeat this process over, and over, and over…..
Learning the panning shot has been challenging, yet fun adding another tool to the toolbox. More to come.
Carrying around a camera since childhood, David Stenhouse has a love for capturing machines, people, and the U.S.A. He is now so blessed to spend each day running a business with his best friend, high school sweetheart, and wife, Shay.


